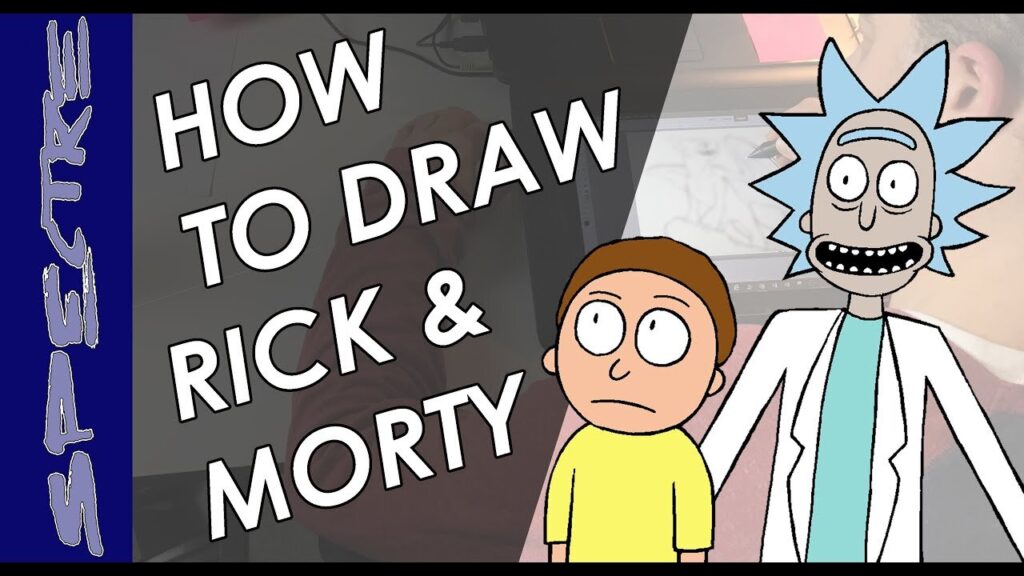
# Master the Art of Rick and Morty: A Step-by-Step Drawing Guide
Want to learn how to draw your favorite characters from the hilariously absurd world of Rick and Morty? You’ve come to the right place! This comprehensive guide provides a detailed, step-by-step approach to mastering Rick and Morty drawing, regardless of your current skill level. Whether you’re a complete beginner or a seasoned artist looking to capture the show’s unique style, this article will equip you with the knowledge and techniques to bring Rick, Morty, and the entire gang to life on paper. We’ll delve into the core elements of their character designs, explore various drawing techniques, and provide expert tips to help you achieve professional-looking results. Get ready to unleash your inner artist and dive into the multiverse of Rick and Morty drawing step by step!
## Why Learn to Draw Rick and Morty?
Learning to draw Rick and Morty isn’t just about replicating images; it’s about understanding character design, mastering basic drawing skills, and having fun expressing your creativity. The show’s distinct art style, characterized by its bold lines, exaggerated features, and vibrant colors, presents a unique and engaging challenge for artists of all levels. Mastering this style can significantly improve your overall drawing abilities and open up new avenues for artistic expression. Plus, it’s a fantastic way to show your love for the show and connect with other fans.
### The Enduring Appeal of Rick and Morty
Rick and Morty’s popularity stems from its clever writing, complex characters, and unique blend of science fiction, comedy, and philosophical themes. The show’s visual style is equally iconic, and being able to capture that style in your own drawings is a rewarding experience. Drawing these characters allows you to engage with the show on a deeper level and appreciate the artistry that goes into creating this animated masterpiece. The characters’ expressions and poses often reflect the show’s humor and wit, making the drawing process both challenging and entertaining.
### Drawing as a Creative Outlet and Skill Builder
Beyond the entertainment value, drawing offers numerous benefits for personal and artistic development. It enhances hand-eye coordination, improves focus and concentration, and fosters creativity and problem-solving skills. Learning to draw Rick and Morty can be a gateway to exploring other art forms and developing a lifelong passion for drawing and illustration. The step-by-step approach we’ll outline in this guide is designed to make the learning process accessible and enjoyable, regardless of your prior experience.
## Essential Drawing Supplies for Rick and Morty Art
Before we begin, let’s gather the necessary supplies. Having the right tools can make a significant difference in the quality of your drawings and the overall learning experience.
* **Pencils:** A set of graphite pencils ranging from 2H to 6B is ideal. The harder pencils (2H) are great for light sketching and outlining, while the softer pencils (6B) are perfect for adding shading and depth.
* **Erasers:** A kneaded eraser and a regular eraser are essential for correcting mistakes and creating highlights. Kneaded erasers are particularly useful for lifting graphite without damaging the paper.
* **Paper:** Smooth drawing paper is recommended for clean lines and smooth shading. Avoid using textured paper, as it can make it difficult to achieve the desired level of detail.
* **Fine-liner Pens:** Black fine-liner pens in various sizes (0.1mm, 0.3mm, 0.5mm) are perfect for outlining and adding definition to your drawings. These pens provide crisp, consistent lines that enhance the overall look of your artwork.
* **Colored Pencils or Markers:** For adding color to your Rick and Morty drawings, consider using colored pencils or markers. Choose a set that includes a variety of colors to capture the show’s vibrant palette.
* **Reference Images:** Gather reference images of Rick and Morty characters from the show. These images will serve as a guide for proportions, details, and overall style.
## Step-by-Step Guide: Drawing Rick Sanchez
Rick Sanchez, the brilliant but often reckless scientist, is one of the most iconic characters in Rick and Morty. Here’s a step-by-step guide to drawing him:
1. **Start with the Basic Head Shape:** Begin by sketching a large, slightly oblong circle for the head. Add a guideline down the center of the circle to help maintain symmetry.
2. **Add Facial Guidelines:** Draw a horizontal line across the center of the circle for the eyes and a shorter line below it for the nose. These guidelines will help you position the facial features accurately.
3. **Sketch the Eyes and Eyebrows:** Draw two large, almond-shaped eyes above the horizontal guideline. Add thick, expressive eyebrows above the eyes, angling them slightly inward to convey Rick’s signature cynical expression.
4. **Draw the Nose:** Sketch a small, triangular nose below the eye guideline. Keep it simple and proportionate to the head size.
5. **Add the Mouth:** Draw a wide, slightly curved line for the mouth. Add a smaller line below it to represent the lower lip.
6. **Sketch the Hair:** Rick’s hair is messy and unkempt. Start by drawing a series of curved lines around the top of the head, creating a wild and spiky effect.
7. **Draw the Neck and Shoulders:** Add a short, thick neck below the head. Sketch the shoulders, keeping them slightly sloped.
8. **Add the Lab Coat:** Draw Rick’s iconic lab coat, starting with the collar and lapels. The coat should be loose and flowing, with wrinkles and folds to add realism.
9. **Refine the Lines and Add Details:** Go over your sketch with a fine-liner pen, refining the lines and adding details such as wrinkles around the eyes, lines in the hair, and shading on the lab coat.
10. **Erase the Pencil Guidelines:** Once you’re satisfied with the inked drawing, erase the pencil guidelines to create a clean and polished final result.
### Tips for Capturing Rick’s Personality
* **Pay attention to the eyes:** Rick’s eyes are often half-closed, conveying a sense of boredom or cynicism. Capture this expression by angling the eyebrows and slightly closing the eyelids.
* **Exaggerate the wrinkles:** Rick is an older character, so don’t be afraid to add wrinkles around the eyes and mouth to emphasize his age and experience.
* **Focus on the hair:** Rick’s messy hair is a key element of his character design. Use a variety of curved lines and angles to create a wild and unkempt look.
## Step-by-Step Guide: Drawing Morty Smith
Morty Smith, Rick’s anxious and impressionable grandson, is another beloved character in Rick and Morty. Here’s a step-by-step guide to drawing him:
1. **Start with the Basic Head Shape:** Begin by sketching a slightly rounded rectangle for the head. Add a guideline down the center of the rectangle to help maintain symmetry.
2. **Add Facial Guidelines:** Draw a horizontal line across the center of the rectangle for the eyes and a shorter line below it for the nose. These guidelines will help you position the facial features accurately.
3. **Sketch the Eyes and Eyebrows:** Draw two large, oval-shaped eyes above the horizontal guideline. Add thin, slightly curved eyebrows above the eyes, giving Morty a worried or apprehensive expression.
4. **Draw the Nose:** Sketch a small, rounded nose below the eye guideline. Keep it simple and proportionate to the head size.
5. **Add the Mouth:** Draw a small, slightly curved line for the mouth. Add a smaller line below it to represent the lower lip.
6. **Sketch the Hair:** Morty’s hair is neatly combed and parted to the side. Start by drawing a series of curved lines around the top of the head, creating a smooth and tidy appearance.
7. **Draw the Neck and Shoulders:** Add a short, thin neck below the head. Sketch the shoulders, keeping them slightly sloped.
8. **Add the T-Shirt:** Draw Morty’s simple t-shirt, starting with the neckline and sleeves. The shirt should be loose and comfortable, with minimal wrinkles or folds.
9. **Refine the Lines and Add Details:** Go over your sketch with a fine-liner pen, refining the lines and adding details such as freckles on the face, lines in the hair, and shading on the t-shirt.
10. **Erase the Pencil Guidelines:** Once you’re satisfied with the inked drawing, erase the pencil guidelines to create a clean and polished final result.
### Tips for Capturing Morty’s Personality
* **Focus on the eyes:** Morty’s eyes are often wide and expressive, conveying a sense of anxiety or surprise. Capture this expression by making the eyes large and round.
* **Keep the lines simple:** Morty’s design is relatively simple, so avoid adding too many details or embellishments. Focus on capturing the essential features and proportions.
* **Pay attention to the hair:** Morty’s neatly combed hair is a key element of his character design. Use smooth, curved lines to create a tidy and well-groomed appearance.
## Mastering the Rick and Morty Art Style
The Rick and Morty art style is characterized by its bold lines, exaggerated features, and vibrant colors. Here are some tips for mastering this unique style:
* **Use bold lines:** Don’t be afraid to use thick, confident lines to outline your drawings. This will help to give your artwork a strong and dynamic appearance.
* **Exaggerate the features:** Rick and Morty characters often have exaggerated features, such as large eyes, small noses, and wide mouths. Embrace these exaggerations to capture the show’s unique aesthetic.
* **Embrace asymmetry:** Rick and Morty characters are often drawn with asymmetrical features, such as uneven eyes or lopsided smiles. This adds to their quirky and unconventional appearance.
* **Use vibrant colors:** Rick and Morty is known for its vibrant and colorful animation. Use a wide range of colors in your drawings to capture the show’s energetic and visually appealing style.
### Understanding Character Proportions
Character proportions are crucial for creating believable and recognizable Rick and Morty drawings. Here are some general guidelines:
* **Head size:** The head should be proportionate to the body, typically around one-sixth to one-seventh of the overall height.
* **Eye placement:** The eyes should be positioned in the center of the head, with equal space above and below.
* **Nose size:** The nose should be relatively small and proportionate to the head size.
* **Mouth size:** The mouth should be wide and expressive, reflecting the character’s personality.
### Developing Your Own Unique Style
While it’s important to learn the fundamentals of the Rick and Morty art style, don’t be afraid to experiment and develop your own unique approach. Try incorporating your own personal touches into your drawings, such as different line weights, shading techniques, or color palettes. The key is to have fun and express your creativity while staying true to the essence of the show’s aesthetic.
## Common Mistakes to Avoid When Drawing Rick and Morty
Even experienced artists can make mistakes when drawing Rick and Morty. Here are some common pitfalls to avoid:
* **Incorrect proportions:** Failing to maintain accurate proportions can result in drawings that look distorted or unnatural.
* **Inconsistent line weight:** Using inconsistent line weights can make your drawings look amateurish and unpolished.
* **Lack of detail:** Neglecting to add details such as wrinkles, lines, and shading can make your drawings look flat and lifeless.
* **Overcomplicating the design:** Trying to add too many details or embellishments can detract from the simplicity and charm of the Rick and Morty art style.
### Troubleshooting Tips for Difficult Areas
* **Eyes:** If you’re struggling to draw the eyes, try breaking them down into basic shapes, such as circles and ovals. Pay attention to the angle of the eyebrows and the shape of the eyelids to capture the character’s expression.
* **Hair:** Drawing hair can be challenging, but it’s important to capture the character’s hairstyle accurately. Use a variety of curved lines and angles to create a natural and dynamic look.
* **Hands:** Hands are notoriously difficult to draw. Start by sketching the basic shape of the hand, then add the fingers and details. Use reference images to guide you.
## Advanced Techniques for Rick and Morty Drawing
Once you’ve mastered the basic techniques, you can explore more advanced methods for enhancing your Rick and Morty drawings.
### Shading and Highlighting
Shading and highlighting can add depth and dimension to your drawings, making them look more realistic and visually appealing. Use a variety of shading techniques, such as hatching, cross-hatching, and blending, to create different textures and tones. Pay attention to the direction of the light source and use highlights to emphasize the areas that are most illuminated.
### Dynamic Posing and Composition
Creating dynamic poses and compositions can make your drawings more engaging and visually interesting. Experiment with different angles and perspectives to create a sense of movement and energy. Consider the placement of the characters and elements within the frame to create a balanced and harmonious composition.
### Using Digital Tools for Rick and Morty Art
Digital drawing tools, such as drawing tablets and software, can offer a range of advantages for creating Rick and Morty art. These tools allow you to easily correct mistakes, experiment with different colors and effects, and create professional-looking artwork with ease. Popular digital drawing software includes Adobe Photoshop, Procreate, and Clip Studio Paint.
## Q&A: Your Rick and Morty Drawing Questions Answered
Here are some frequently asked questions about drawing Rick and Morty, along with expert answers:
1. **What’s the best way to learn the Rick and Morty art style quickly?**
* Focus on mastering the basic shapes and proportions of the characters. Practice drawing the eyes, nose, mouth, and hair repeatedly until you feel comfortable with their unique characteristics.
2. **How can I make my Rick and Morty drawings look more dynamic?**
* Experiment with different poses and angles. Use reference images to guide you and pay attention to the flow of movement in the character’s body.
3. **What are some common mistakes beginners make when drawing Rick and Morty?**
* Incorrect proportions, inconsistent line weight, and a lack of detail are common mistakes. Pay attention to these areas and practice regularly to improve your skills.
4. **What’s the best type of paper to use for Rick and Morty drawings?**
* Smooth drawing paper is ideal for clean lines and smooth shading. Avoid using textured paper, as it can make it difficult to achieve the desired level of detail.
5. **How can I add shading and highlights to my Rick and Morty drawings?**
* Use a variety of shading techniques, such as hatching, cross-hatching, and blending, to create different textures and tones. Pay attention to the direction of the light source and use highlights to emphasize the areas that are most illuminated.
6. **What are some good resources for learning more about drawing Rick and Morty?**
* Online tutorials, drawing books, and fan art communities are great resources for learning more about drawing Rick and Morty. Explore different sources and find what works best for you.
7. **How can I develop my own unique style when drawing Rick and Morty?**
* Experiment with different line weights, shading techniques, and color palettes. Incorporate your own personal touches into your drawings while staying true to the essence of the show’s aesthetic.
8. **What are some essential drawing tools for creating Rick and Morty art?**
* Pencils, erasers, fine-liner pens, colored pencils or markers, and reference images are essential drawing tools for creating Rick and Morty art.
9. **How can I improve my hand-eye coordination for drawing Rick and Morty?**
* Practice regularly and focus on the details of the characters. Use reference images to guide you and pay attention to the lines and shapes.
10. **What’s the best way to practice drawing Rick and Morty?**
* Draw regularly and experiment with different techniques. Don’t be afraid to make mistakes and learn from them. The key is to have fun and enjoy the process.
## Conclusion: Unleash Your Inner Rick and Morty Artist
Learning to draw Rick and Morty is a rewarding and enjoyable experience that can enhance your artistic skills and deepen your appreciation for the show. By following the step-by-step guides, mastering the essential techniques, and avoiding common mistakes, you can create stunning Rick and Morty drawings that capture the essence of the characters and their unique world. Remember to practice regularly, experiment with different styles, and have fun expressing your creativity. So grab your pencils, gather your supplies, and get ready to unleash your inner Rick and Morty artist! Share your creations with the world and connect with other fans who share your passion for this iconic animated series. Ready to take your Rick and Morty art to the next level? Explore advanced tutorials and join online communities to continue honing your skills and expanding your artistic horizons!
